Tutorials page Submissions page
Click here to subscribe to our newsletter and receive updates by email Click here to take our survey - thanks!


EMITTERS 101 [MetaForm 1.1]

This tutorial is designed to give MetaForm users an introduction to using emitter props. During this tutorial, we shall explore emitters and their settings and parameters, and how to create some basic effects.

Before you start, please set the Display Units to Poser Native Units in ‘Edit->General Preferences…

It might also be handy if you have the DivX codec installed for creating movies, as we'll be making quite a few as we test different settings (DivX compresses movies using a similar technique to MP3s, and results in nice small movie files). You can get it at divx.com/divx/download/


By default, emitters are created in the center of the Poser scene at 0 along the x and z axes, and at 0.5 Poser Units from the floor (y axis). This equates to about chest height on a standard Poser figure. They are also oriented at 0 degrees rotation in all axes, which is vertical.

Directional emitter added to scene

Open a fresh Poser scene. Click on the Directional Emitter button in the MetaFlow panel to add an emitter prop. Delete any figures so only the emitter is in the scene.

Now rotate the emitter -90 degrees on the z axis. This will allow us to see the size and trajectory of the emissions better.

Directional emitter at -90 on z axis

Click either of the Surfacing buttons to simulate particle emissions. The Simulate dialog pops up and allows you to control the generation of the particles. This dialog appears every time you enable Surfacing with MetaFlow (particle-generating) props in the scene.

Number of Preframes is set to 30 by default. This means that there will be 30 frames of particle emission before the start frame. Specifying 0 preframes means that the start of the particle emissions shall be seen. This will either be desirable or undesirable, depending on your requirements. You can refer to the MetaForm User Guide for more details on these settings.

To illustrate this, make two movies from the current scene, one with 30 preframes, and one with 0 preframes:

  1. Enable Surfacing. In the dialog, leave the values to the default. Click on Poser's 'Animation->Make Movie...' command to create a movie. Save it as 'emittertest01.avi'.
  2. When done, disable and re-enable Surfacing. In the dialog, set Pre-Frames to 0 this time. Click on Poser's 'Animation->Make Movie...' command to create a movie. Save it as 'emittertest02.avi'.

The first movie should show a stream of blobs and the second should show the creation of the particle stream. (Note: When Surfacing is enabled, emitter props are made invisible. They re-appear when Surfacing is disabled. You can make the prop visible whilst in Surfacing mode like our screenshots by ticking the box in the Properties tab found in Poser's Parameters palette)

MetaForm's Simulate dialog


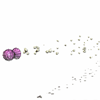
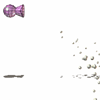
Simulated emissions

Disable Surfacing by clicking on the depressed Surfacing button to see the emitter prop again. Select the prop and look in the Parameters palette. Under the Transform group is the MetaFlow group. Under that is the Particle group. In the Particle group, change the Particle Size from 0.050 to 0.025. The emitter prop will now emit much smaller particles.

Enable Surfacing by clicking on either of the buttons and use the default frame settings in the dialog (use the default settings from now on unless asked to change them). The particles are now much smaller.

Particle Size

Next, we'll change the rate at which the emitter generates particles. We can increase this setting in the Parameters palette in the MetaFlow group. Change the Particle Rate from 30 to 200.

Enable Surfacing again. The emitter is now generating many more particles.

Remember, when changing parameter values, MetaForm must recalculate the emissions, so you must disable and re-enable Surfacing. (Instead of toggling, you can shift-click an already pressed Surfacing button to recalculate)

Particle Rate

The Particle Velocity parameter, as you would expect, controls the speed at which the particles initially leave the emitter. The default is 1. In the thumbnails, you will see values of 2 and 8 used.

It is important to note that when using higher velocities, the Particle Rate will usually need to be increased.

Particle Velocity

The Particle Velocity Var(iance) parameter can be used to add a degree of randomness to the particles' velocities. The variance makes the emitter generate random particles that are slightly faster and slower than the base velocity setting.

Particle Velocity Variance

We'll now look at the Particle Deviation parameter. This controls the angle at which the particles are emitted. A value of 0 is a narrow stream (still affected by gravity, wind etc though) and a value of 1 equates to a 180 degree spread from the emitter in all three degrees.

Particle Deviation

The gravity characteristics for a Surface can be edited. This is not an emitter parameter, but a Surface setting in the Edit Surface dialog.

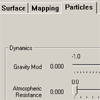
Disable Surfacing and click on the Edit Surface button in the Surfaces panel in MetaForm. The Gravity Modifier slider is, by default, set to 1. This means that gravity shall affect this Surface as normal.

Edit Surface dialog

Compare values of 0 and -1 (and try different values in between) to see how they affect the particle emissions.

A negative value means that the particles will float upwards, depending on the strength of the negative value. A value of 0 means that the particles shall be unaffected by gravity, and shall travel based on their speed and direction.

Gravity
The Field Strength parameter controls the strength of each particle's field. If a particle's Field Strength is below the Surface's Threshold value (0.65 by default), then a particle wont create a blob on its own. If, however, multiple particles' fields combine, they will create geometry based on their cumulative field strengths. Field Strength

The next parameters we'll look at control the creation and destruction of the particles.

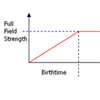
Part. Birthtime is the time taken in seconds for a particle to reach its full field strength. The Part. Lifetime parameter contains the length of time in seconds that each particle will remain at its full field strength. Part. Lifetime Var adds a degree of randomness to the Lifetime value for some particles. Part. Deathtime controls the time it takes (again in seconds) for a particle to go from full field strength at the end of its lifetime to zero field strength. If this parameter is zero the particle will be removed from the simulation immediately.

Particle lifecycle

Part. Birthtime can be used to alter the creation of particles, so the point at which they reach their full field strength is later than usual. This can be useful in reducing the effect of particles being bunched together as they leave the emitter. Using a non-zero Birthtime value can allow them to travel and spread out before reaching their full field strength.

Part. Birthtime

Part. Lifetime is the time in seconds that a particle remains at full field strength (once full field strength has been reached). The length of time that particles remain in the scene can be increased or decreased, depending on your requirements. Part. Lifetime Var adds a random variance to particles' Lifetime value. Their actual Lifetime may be plus or minus the value the Part. Lifetime Var value.

Part. Lifetime

Part. Deathtime is the time it takes for a particle to go from full field strength at the end of it's Lifetime value to zero field strength. Particles can either fade out (by using a non-zero value) or disappear immediately (zero value) from the simulation.

Please note that a Surface's Particle Floor and Ceiling settings always override the Lifetime and Deathtime parameters and destroy particles regardless of the Lifetime and Deathtime values.

Part. Deathtime


MetaForm's emitter props are almost fully animateable. Most of the parameters can be keyframed, similar to a standard Poser figure. This allows detailed control over particle emissions, as well as the positioning and orientation of the emitters themselves, during your Poser animations.  


To top of page top 

 
Back to home