| In this tutorial, we
cover the basics of creating Surface props, applying
Field and Particle characteristics to a stock Poser
figure and applying Presets to the Surfaces and
Figures. |
| |
Step 1
[1] Create a new
Surface using the "Create Surface" button
in the "Surfaces" panel of the plug-in.
[2] In the dialog
that appears, rename it "Fire Surface"
(for example).
[3] Click OK. |
| 
|
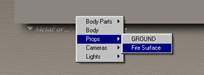
| The "Surface" is a
special Poser prop that MetaForm creates. Initially
it is invisible and has no geometry associated with
it. It can be selected using in the standard Poser
actors menu or by clicking on its name at the top
of the plug-in window. |
| 
|
The Surface prop has a number
of parameters associated with it which are explained
in detail in the User's Guide. |

|
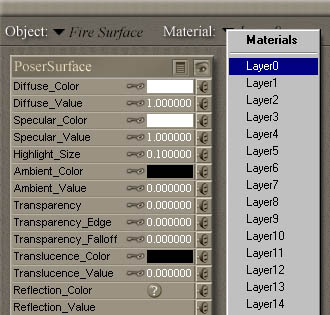
| The Surface prop also has a
number of pre-defined material names that will be
associated with the surface layers when the geometry
is created. |
| 
|
Step
2a
Make sure that the Fire Surface prop is the currently
selected actor in Poser. Then load the Preset
for either "Simple Flame Surface" or
"Combustion Surface". |
| 
|
Two alternate fire surface
presets are provided with MetaForm. The Simple
Flame Preset creates surfaces with distinguishable
tongues of flame that give way to a small amount
of gray smoke. The Combustion
Preset creates surfaces with a particle based
fire effect. No flames are identifiable, but instead
multiple layers of hot particles are emitted which
turn into large quantities of black smoke as they
rise. For both surfaces, the transition between
fire and smoke is dependent by the V texture coordinate
of the preset materials and can be controlled
by altering the Particle V Mod Rate
parameter of the emitters. This parameter is automatically
set for the fire emitter presets. |
| |
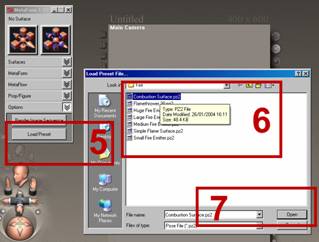
| Step 2b (ProPack)
To load the Surface Preset in ProPack
activate the "Load Preset" button
[5] and then
browse to and select the desired preset
file in the dialog and click "Open"
[7]. |
Step 2b (Poser 5)
In Poser 5 the Surface
Preset can be loaded directly from the "MetaForm
Presets\Fire" subfolder in the standard
Poser Pose Library. |
|
|
|
The Preset files are special
Pose files intended for use with MetaForm props.
The Surface Presets contain parameter settings
for mapping, layer control, particle dynamics
etc., as well as surface materials that are applied
to the layers of the surface geometry when it
is created. |
| |
Step 3
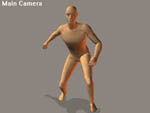
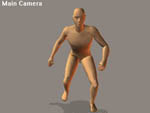
Load or select the figure that you want to "immolate".
Do whatever posing or animation you need.
Here were using the low res P4 Nude male as the relatively low poly
count makes calculations quicker and uses fewer resources. |
 |
 |
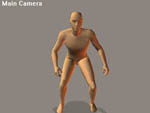 |
| Frame 1 |
Frame 31 |
Frame 60 |
|
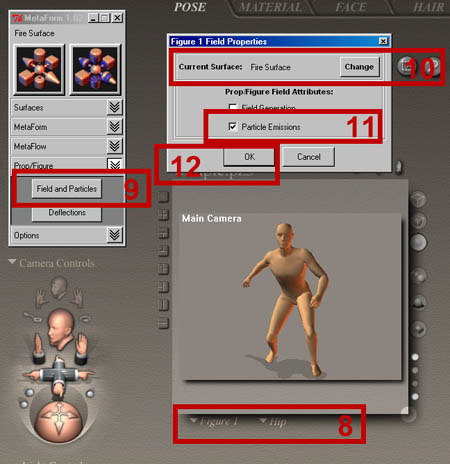
| Step 4
With any body part of the figure selected as
the current actor [8],
activate the "Fields and Particles"
button of MetaForm's Prop/Figure panel [9].
In the dialog box make sure that the Current Surface
is the "Fire Surface" [10]
and check the "Particle Emissions" selection
[11]. Click OK [12]. |
|
| Selecting field emissions
add new parameters to a figure's "body"
actor. These new parameters are detected by MetaForm
during the simulation and surfacing process and
allow MetaForm to include the figure's mesh in
field and particle calculations. |
| |
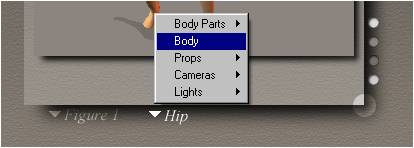
| Step 5
Once MetaForm has finished processing, select
the "body" actor of the figure from
the actor pulldown menu under the Poser document
window. |
 |
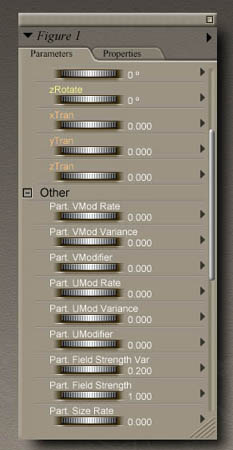
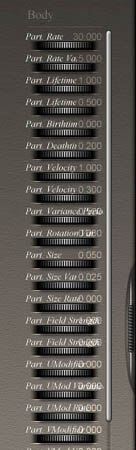
| You will see that a whole
new set of MetaFlow Particle Emission
parameters have been added to the figure.
These parameters control the emission of particles
from the figures mesh. Characteristics such as
the initial velocity, size and lifetime of the
particles emitted can be set and keyframed using
the parameters.
The particles emitted are associated with the
Surface selected in the Field Properties Dialog
when they were added to the figure and also inherit
many of their characteristics from the Surface
prop, such as gravity effects and material settings. |
| 
|
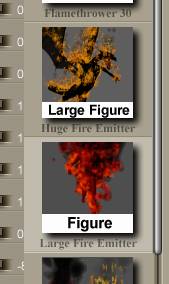
Step 6
With the "body" part still selected,
load either the large flame emitter preset or
the huge flame emitter preset from the "Poses\MetaForm
Presets\Fire" library.
ProPack users will need to load these files using
the "Load Presets" button, whereas Poser
5 users can load the Presets directly from the
Pose library palette (see Step
2).
The "Large Fire Emitter" is good for
human sized figures, the "Huge Fire Emitter"
is good for (approx 5x) larger than human figures. |
| 
|
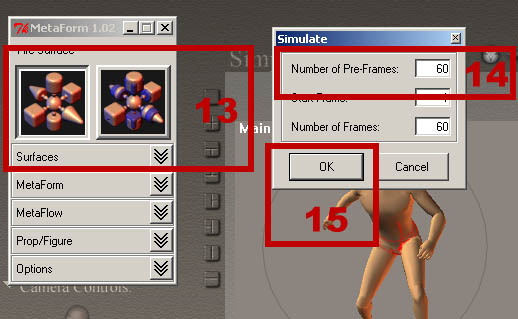
| Step 7 Click
on one of the surfacing buttons [13].
In the Simulation Dialog set the number of pre-frames
[14] to 60 or 90
to allow time for the fire to develop before the
first frame and click OK [15].
MetaForm will then simulate the emission of metaballs
from the surface mesh of the figure and create
the actual surface geometry. |
| 
|
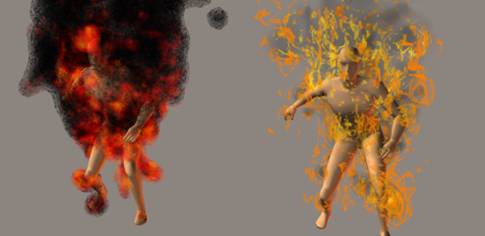
| When rendered the Surfaces
should look like the images shown. The figure
on the left uses the Combustion Preset in the
surface material. The figure on the right uses
the Simple Flame preset.
If the results arent quite what were expected,
try adjusting the particle parameters in the body
actor of the figure. Particle rate increases the
number of particles emitted per second and Particle
Size increases the size of the particles.
The transition between fire and smoke can be
adjusted using the Particle V Mod Rate parameter,
decreasing the value of this parameter causes
the particles to age more slowly, resulting
in more fire and less smoke. |
| 
|
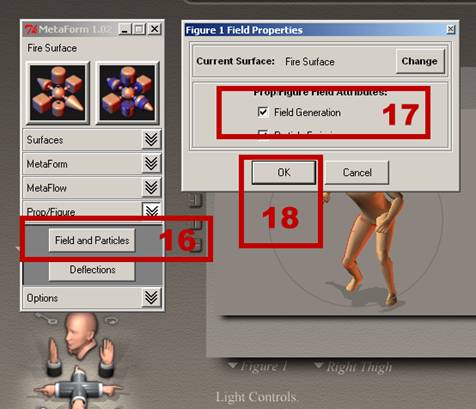
| Step 8
We can further enhance the effect of the immolation
by covering the body of the figure with the fire
Surface.
In order to do this disable Surfacing then click
again on the Field and Particles button [16]
(making sure that a body part of the figure is
the currently selected actor).
Select the Field Generation checkbox [17]
of the Dialog and click OK [18].
MetaForm will now add new field generation parameters
to the body actor of the Figure. |
| 
|
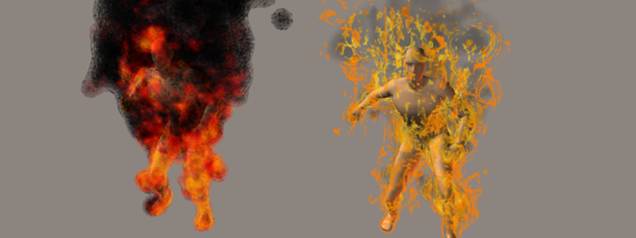
Step 9
Reactivate Surfacing. Now you can Render the
final image or create an animation using the Render
Image Sequence button in the Options Dialog. |
 |